At Iterable we use open source libraries a lot in our Scala code. Typically we use libraries hosted on Maven Central, so adding the dependency in sbt is as simple as:

But how do you publish your library for other people to consume in this way? The process is not entirely straightforward, so we decided to document the process in a blog post.
But first, why is this useful? We’ve found releasing our own libraries to be helpful for a variety of purposes, including:
- Releasing utility libraries for other developers to use, for example https://github.com/Iterable/play-formnolia.
- Forking libraries that are not being actively maintained and have issues that are hard to work around. Releasing a new version allows other developers to benefit from your changes, and allows us to simply upgrade the library version to fix the issue.
- Temporarily releasing fixed versions of libraries while waiting for a patch to be reviewed upstream, or while waiting for a stable release containing the fix.
In all of these cases we could keep the code private and release it to a private repository, but there’s no real benefit to doing that if the library itself is not core to our business. By releasing to Maven Central we make it as easy as possible for both our developers and outside developers to benefit from our work.
Cross-building
Scala major versions are not backwards compatible, so if you’re publishing a Scala library, you’ll typically want to build it with multiple Scala versions. To do that, add the following to build.sbt:

scalaVersion is the default Scala version. crossScalaVersions contains all the versions you wish to build with. Running a command with a + like +test will run it on all Scala versions. You can also use ++$SCALA_VERSION test to run on a specific Scala version. For example, you can create multiple jobs on Travis CI for different Scala versions:

Usually, you’ll want to release a library to a few Scala versions, depending on which libraries your dependencies support. For example, if your library depends on Akka, you’d typically want to release it for the versions of Scala your Akka version supports.
Note: when you release your artifact, the version will be appended to the artifact name followed by an underscore, like mylibrary_2.12. In sbt, "com.example" %% "mylibrary" % "1.0.0" is equivalent to "com.example" % s"mylibrary_$ScalaVersion" % "1.0.0".
Getting a Sonatype Account
Sonatype offers free OSS repository hosting, which is the most popular way to release libraries to Maven Central. Their service allows you to deploy both snapshot and release binaries of your open source libraries, and sync the releases with Maven Central. Sign up for an account and follow their guide to get an account for your domain. This requires opening a JIRA ticket at https://issues.sonatype.org/.
For example, this is the one to create the com.iterable group ID: https://issues.sonatype.org/browse/OSSRH-25181. In general you or your company will need to own the domain for the group ID you choose. If you’re a github user, you can use something like com.github.yourusername.
Setting up Your PGP Key
You’ll need to have a PGP key to sign your releases. If you already have one, you can use that one, or you can create a separate key just for publishing.
You can create a new key with gpg by following these steps:
- Generate a key with
gpg --gen-key. If you want to create a shared key for publishing, consider using something like “$yourcompany bot” or “$projectname bot” as the name. Use your own email address for the email. - Then export with
gpg --armor --export $IDwhere$IDis the identifier for that key as given in the gpg output. - Next, visit https://pgp.mit.edu/ and paste the output of that command. Make sure your key is between the lines
-----BEGIN PGP PUBLIC KEY BLOCK-----and-----END PGP PUBLIC KEY BLOCK-----, and click “Submit this key to the keyserver!”
Releasing Through sbt
Once you’ve gotten this far, you can choose among a few different sbt plugins depending on how you want to perform releases. One strategy is to automate this completely through CI, using a plugin like https://github.com/olafurpg/sbt-ci-release.
Under this method, simply pushing a tag will trigger a release for the tagged version in Travis CI. Alternatively, you can opt for an explicit release process using only the sbt-sonatype plugin and optionally the sbt-release plugin. Once you understand the different pieces, you can customize the process to what works best for your team.
Publishing to Sonatype
To publish to Sonatype, you’ll need to add the sbt-sonatype plugin:

Next, you’ll want to define your Sonatype credentials somewhere. sbt-sonatype can pick them up from SONATYPE_USERNAME and SONATYPE_PASSWORD or you can set them globally in $HOME/.sbt/(sbt-version 0.13 or 1.0)/sonatype.sbt:

Every person (or bot) who publishes will need to have this set up, and their Sonatype account will need to have access to the group ID you want to publish to.
At this point, you’ll want to make sure you have the relevant information in build.sbt so sbt-sonatype can include the required information in your POM file. It should look something like this:
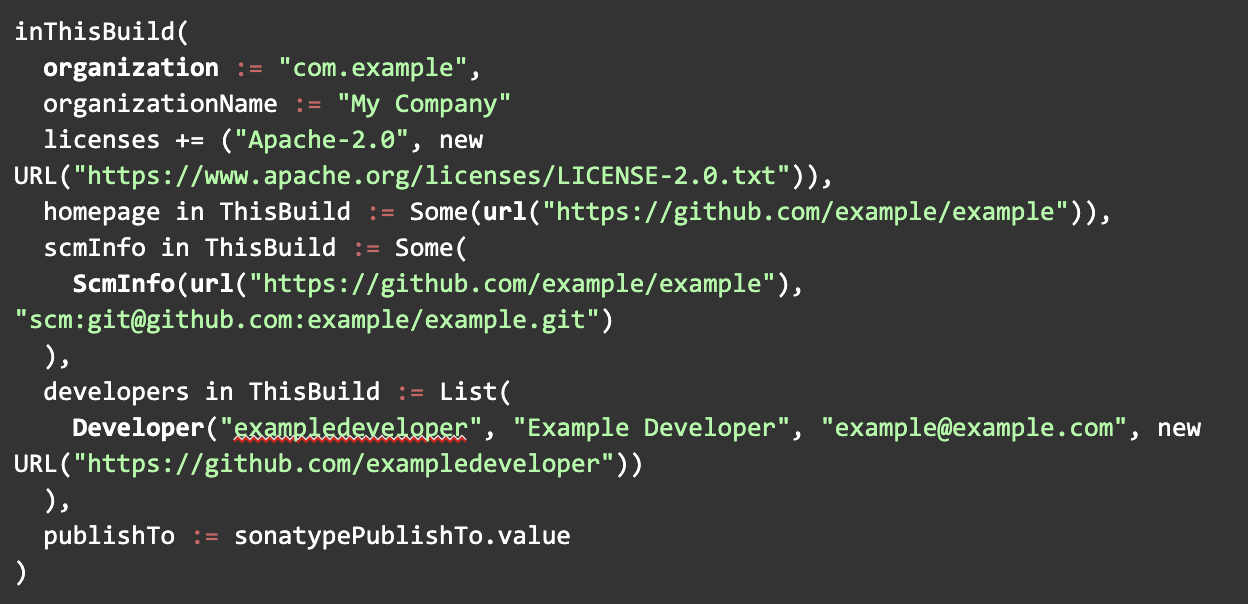
Note that inThisBuild defines the settings scoped to ThisBuild, which will apply to all submodules as well.
Make sure you have a version setting defined as well. This is often defined in version.sbt but for now can be in your build.sbt along with the other settings:

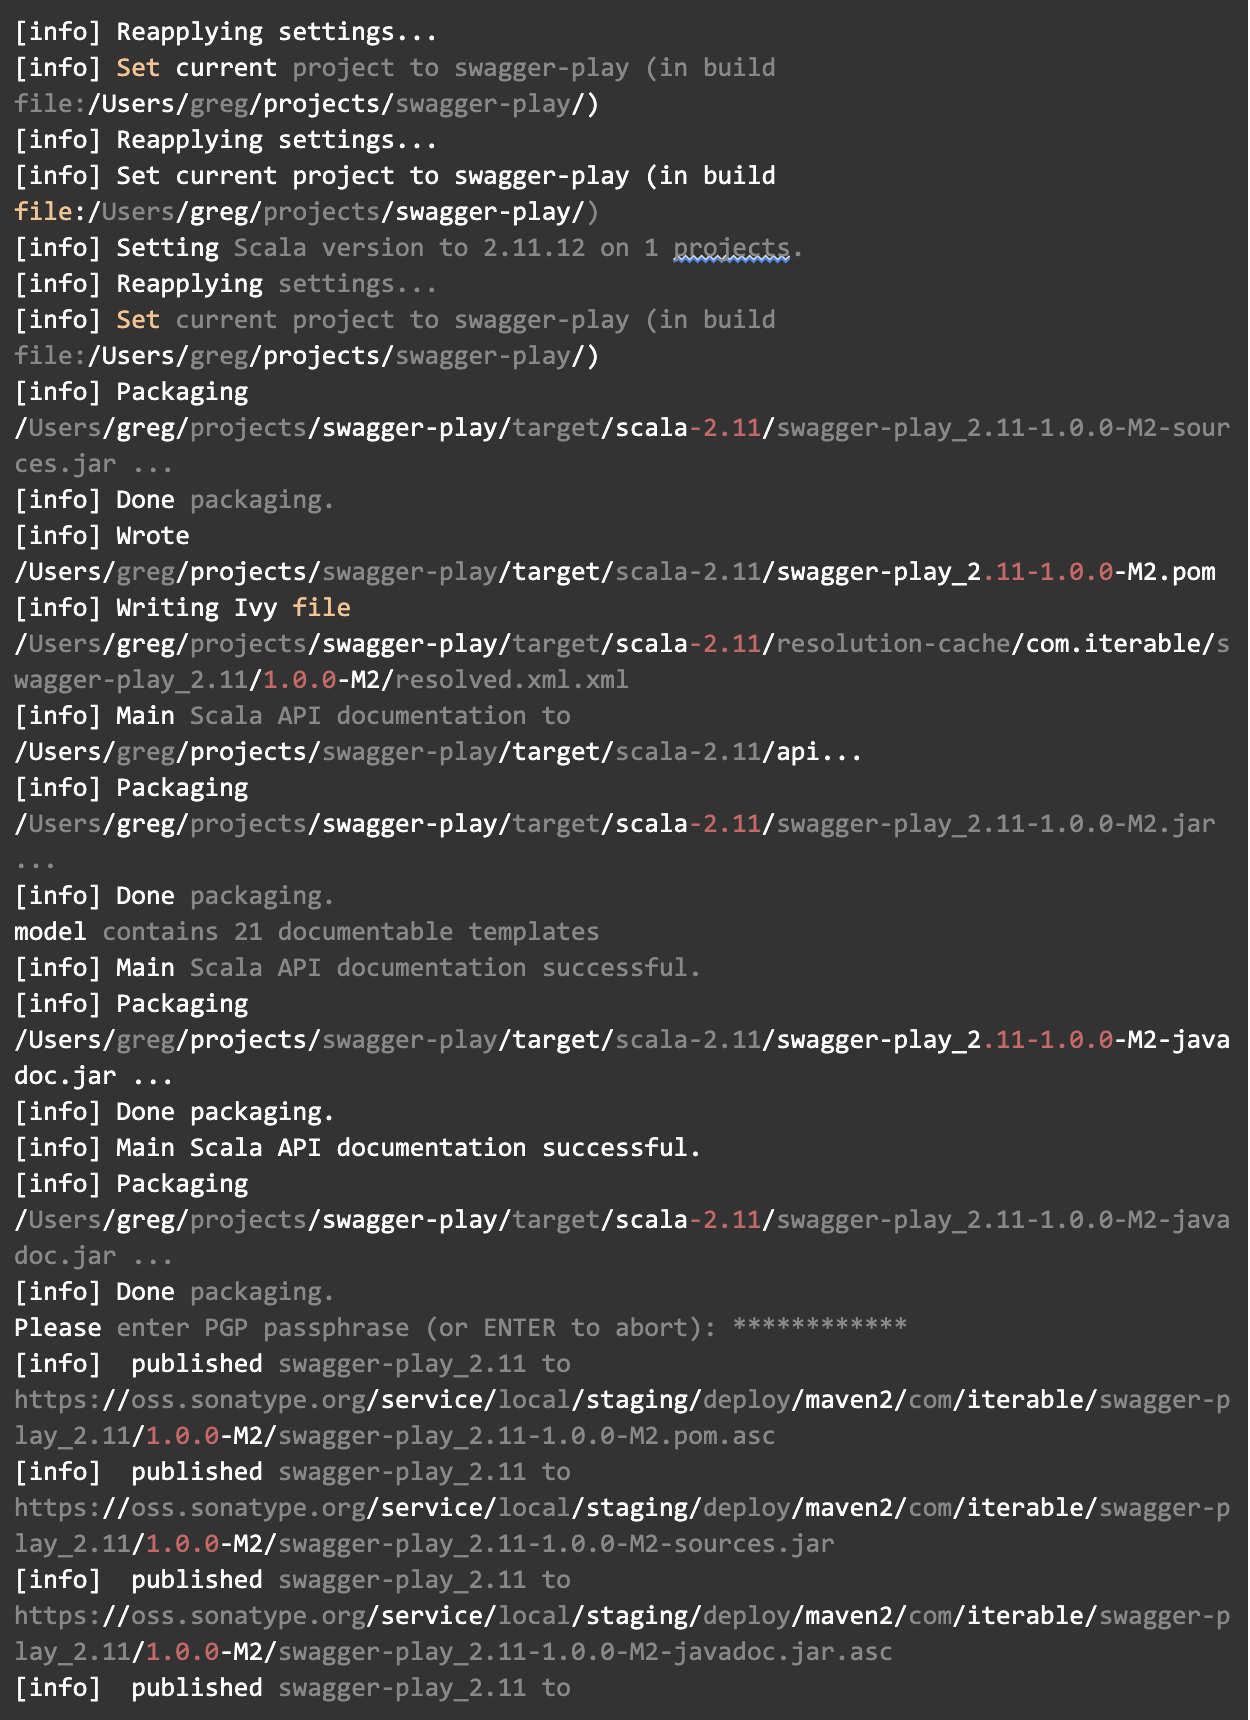
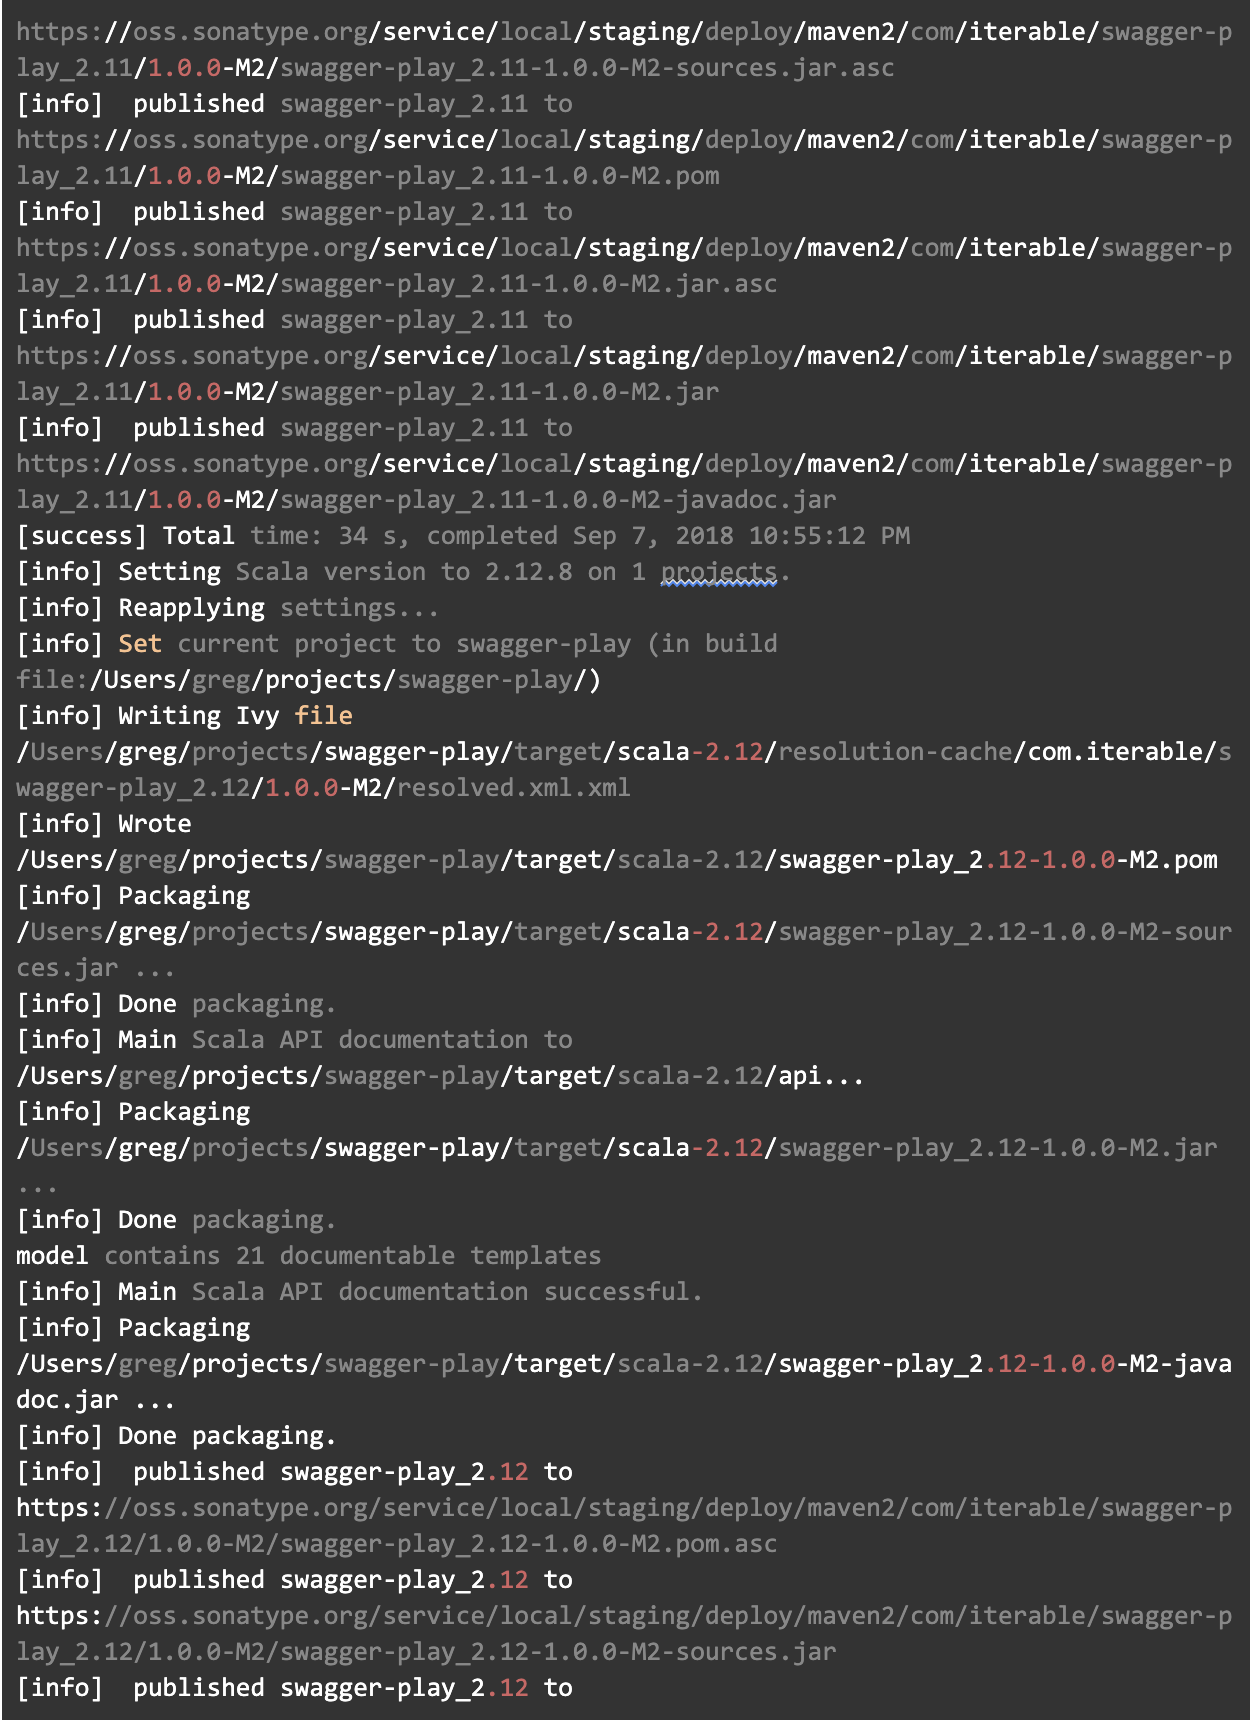
Next, run the +publishSigned command. Since this is a SNAPSHOT version, this will publish to a snapshots repository at https://oss.sonatype.org/content/repositories/snapshots/. You’ll have to enter your PGP passphrase. It should look like this:
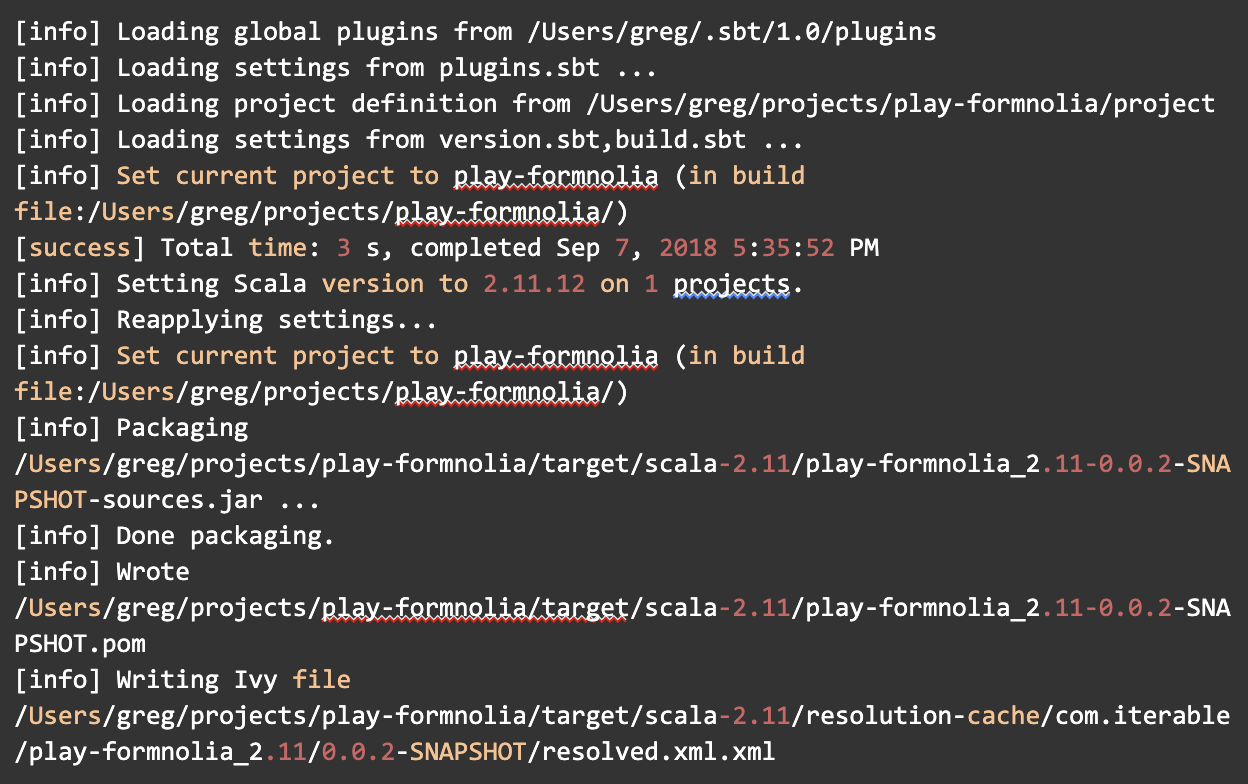
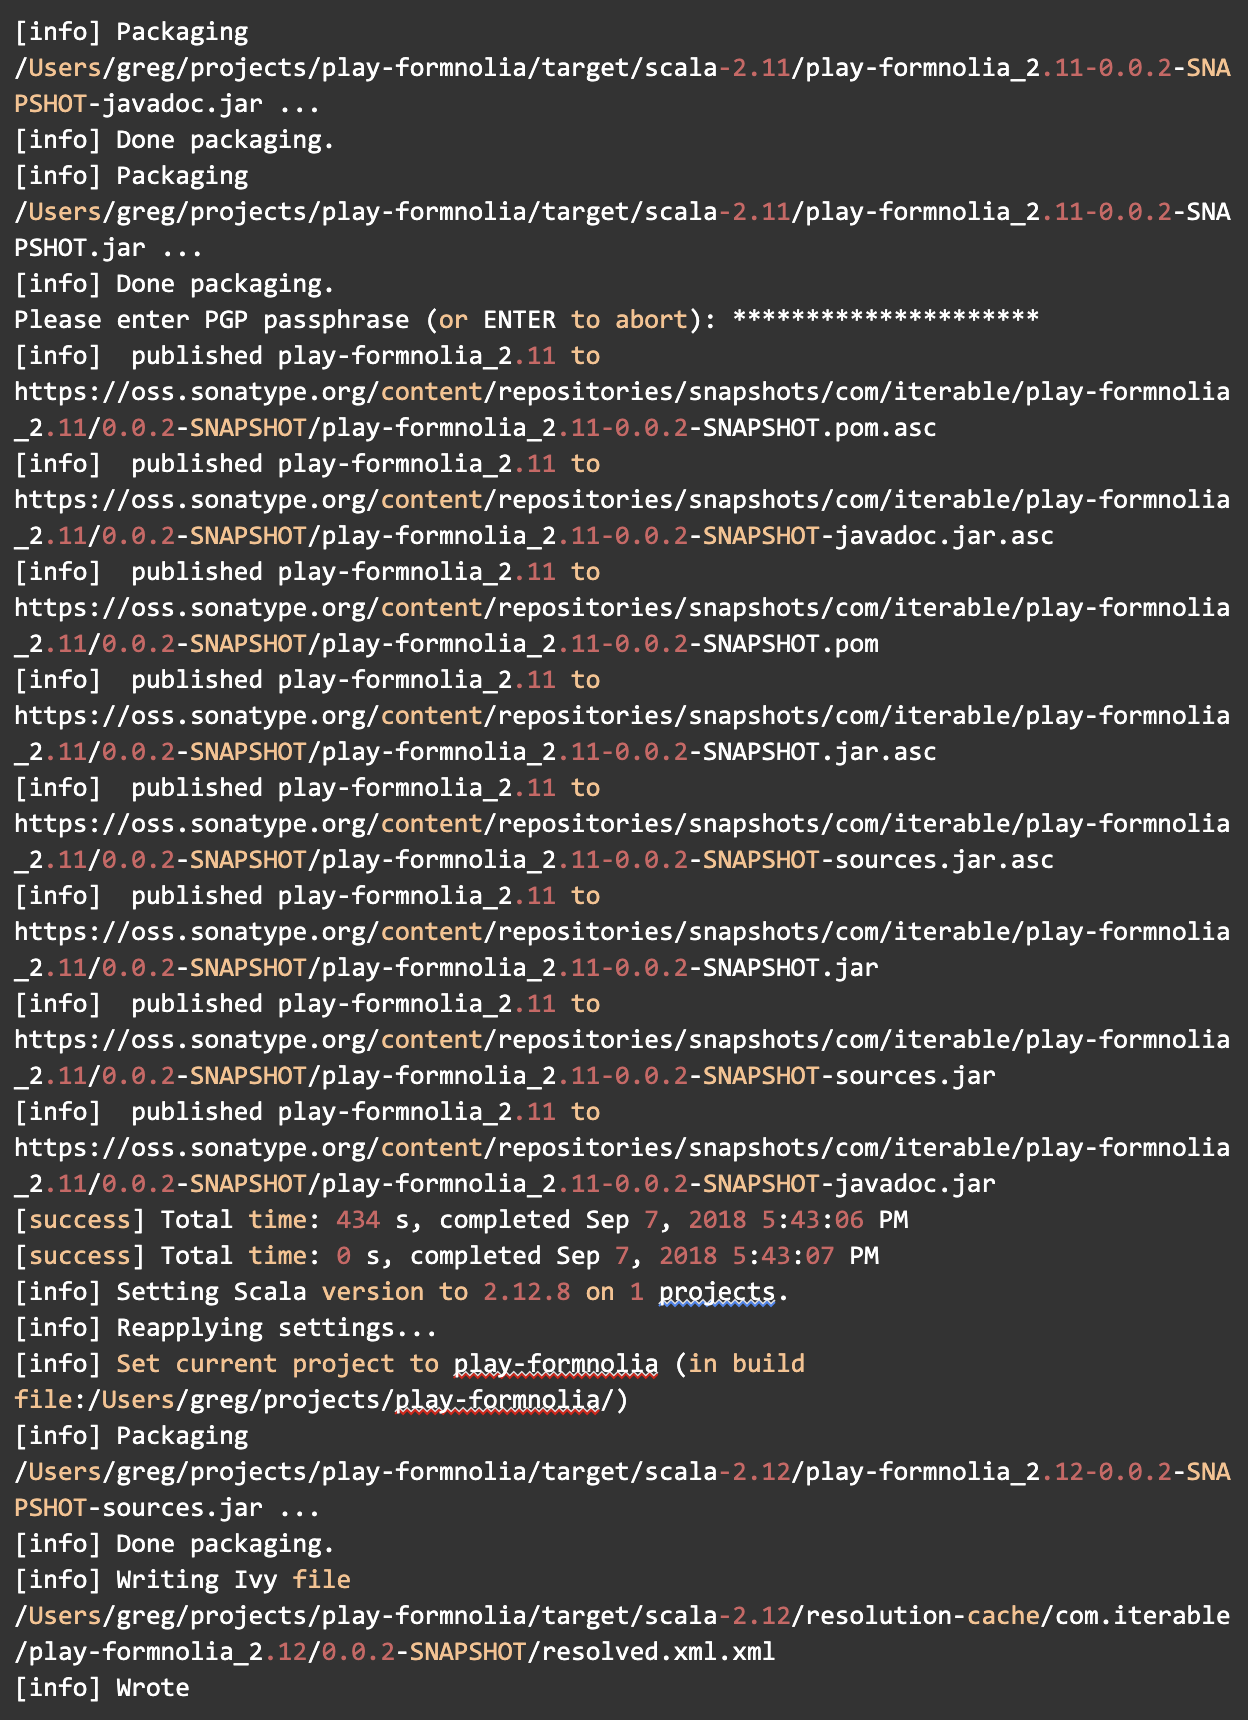
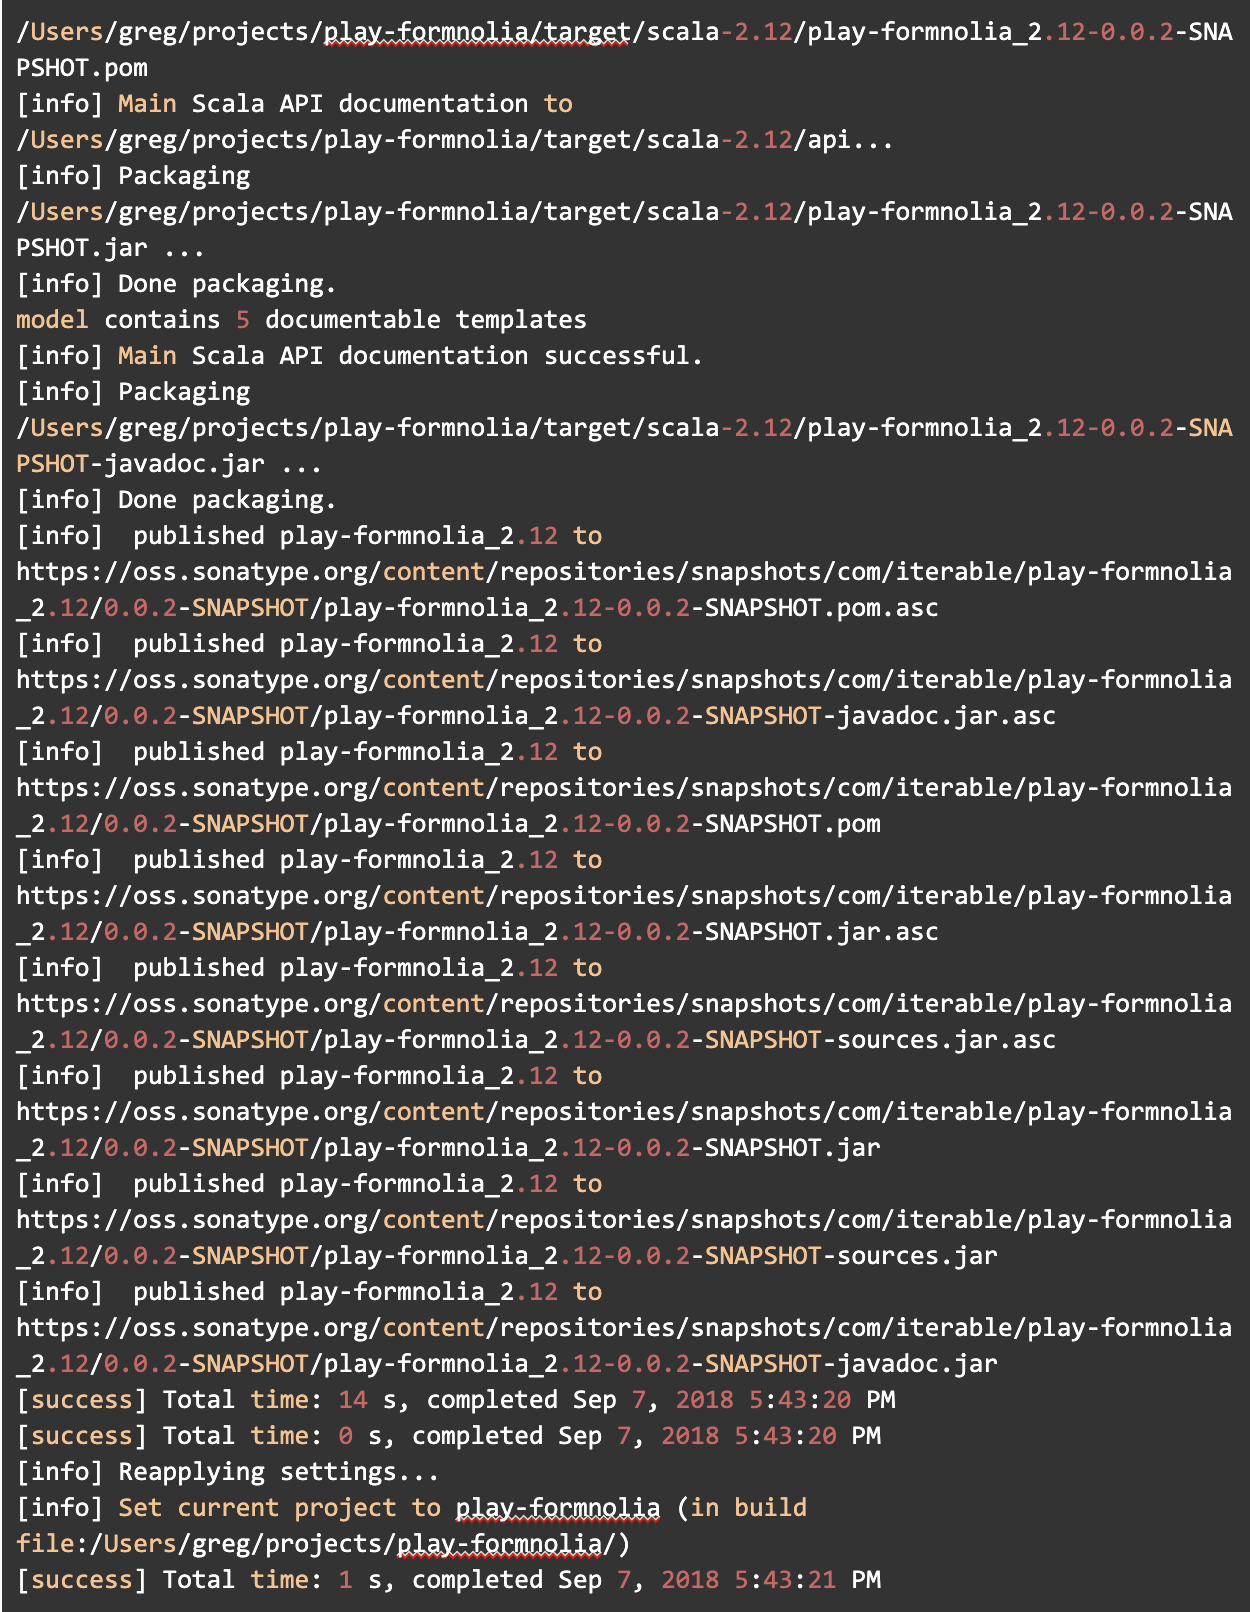
At this point you can test out your snapshot version:

Note that you can also test out a version from your local Maven repository using sbt publishLocal, then reference it from another project on your machine, as described above.
Snapshots are great for testing, but not great for using in production. You’ll want to have a stable production release to depend on in your app or library.
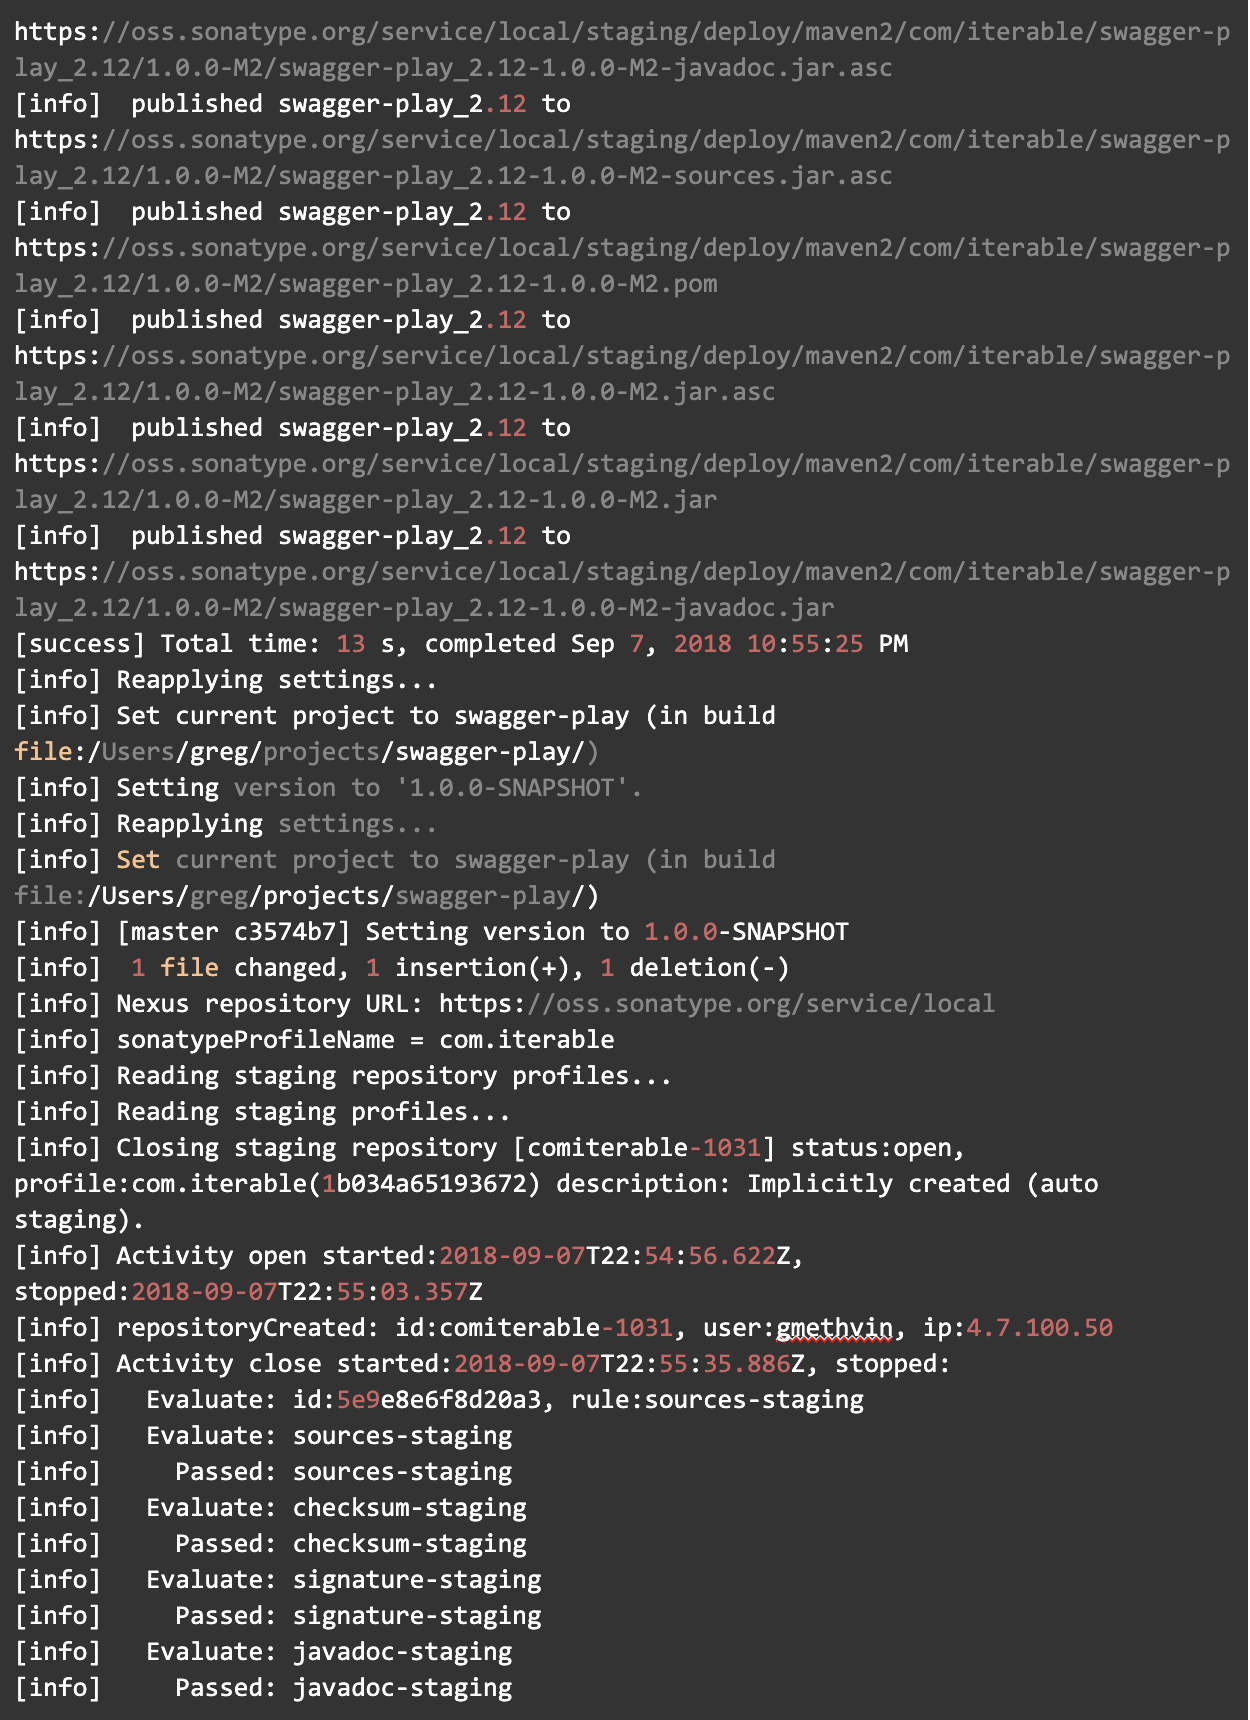
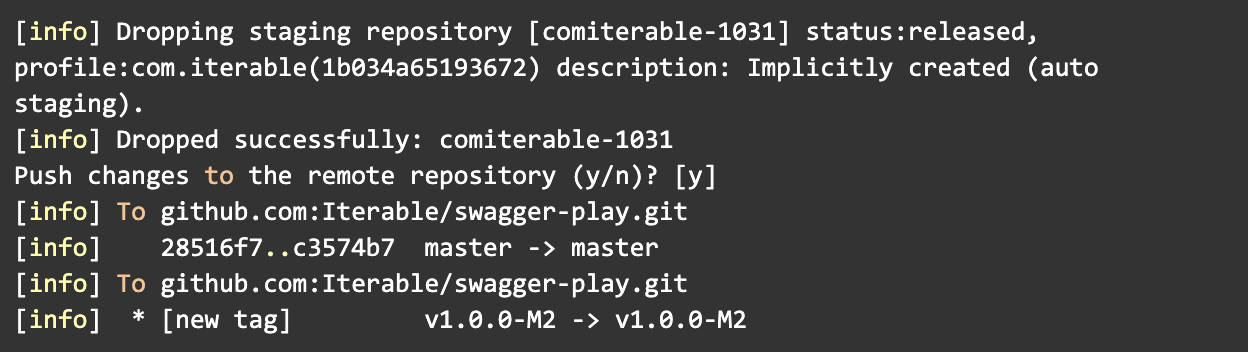
To publish a real production release, you’d set the version key to something like 1.0.0 (no SNAPSHOT). Your release will be published to a staging repository. When you log into https://oss.sonatype.org/ and go to “Staging Repositories” you’ll see a repository named after your group ID (in our case something like comiterable-1234). You can release the staging repo from that UI, or you can use sbt sonatypeReleaseAll to release from sbt.
This is really all you need to do for releases. If you prefer to manage your release versions solely using git tags, you can use the sbt-dynver plugin to automatically compute a version.
Next we’ll talk about sbt-release, a way to define a more sophisticated set of steps for a release.
Using Your Published Release
Once your staging repository is closed, it usually takes 15 minutes or so for Sonatype to sync to Maven Central. If you want to use it immediately you can add the Sonatype releases repository:

If you have a SNAPSHOT release, you’ll need to add:

Using sbt-release
Sometimes you want a step-by-step interactive process for doing releases to make sure you don’t forget anything. sbt-release is a popular solution to this problem. To set it up, add to plugins.sbt:
![]()
Then make sure your version is defined in version.sbt in your project root. This needs to be in a separate file because it’s updated during the release process:

Then add the following information to build.sbt (in addition to the information you added above):
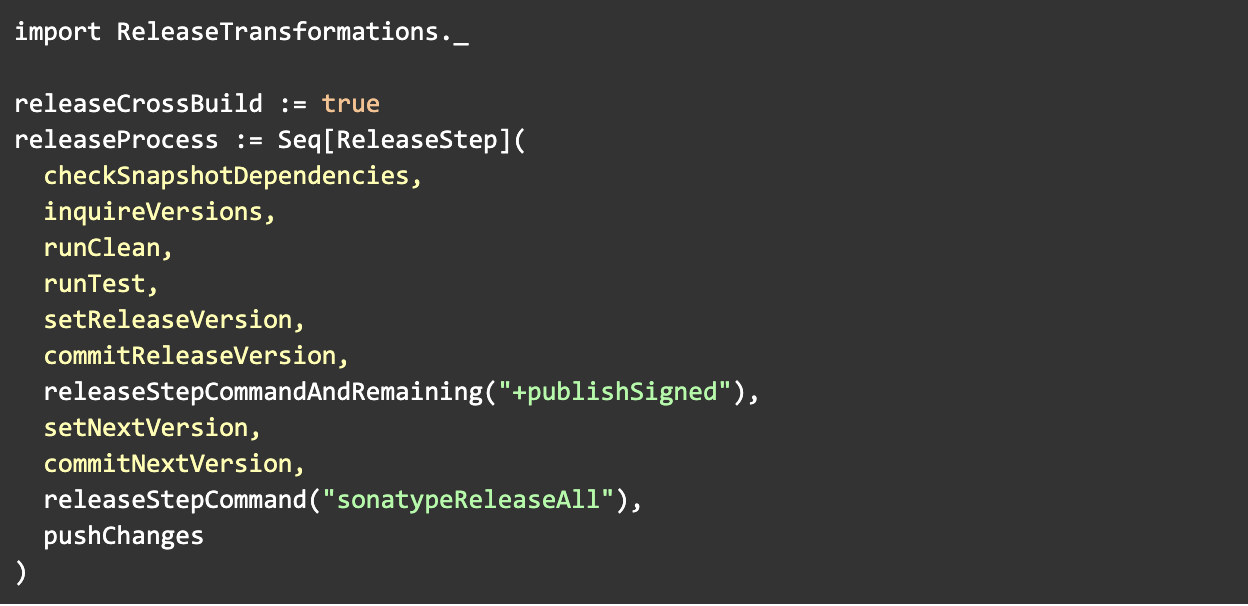
This defines a set of steps for doing a release:
- Check that there are no
SNAPSHOTdependencies. In other words, all dependencies should point to a stable release, not a snapshot. - Ask the user for current and next versions.
- Run
clean. - Run
test. - Set the release version in
version.sbt. - Commit the release version.
- Tag the release in git (by default this will be something like
v1.2.3). - Run the
+publishSignedcommand to publish for allcrossScalaVersions. - Set the next version in
version.sbt. - Commit the release version.
- Finally, push the changes to the remote git repository.
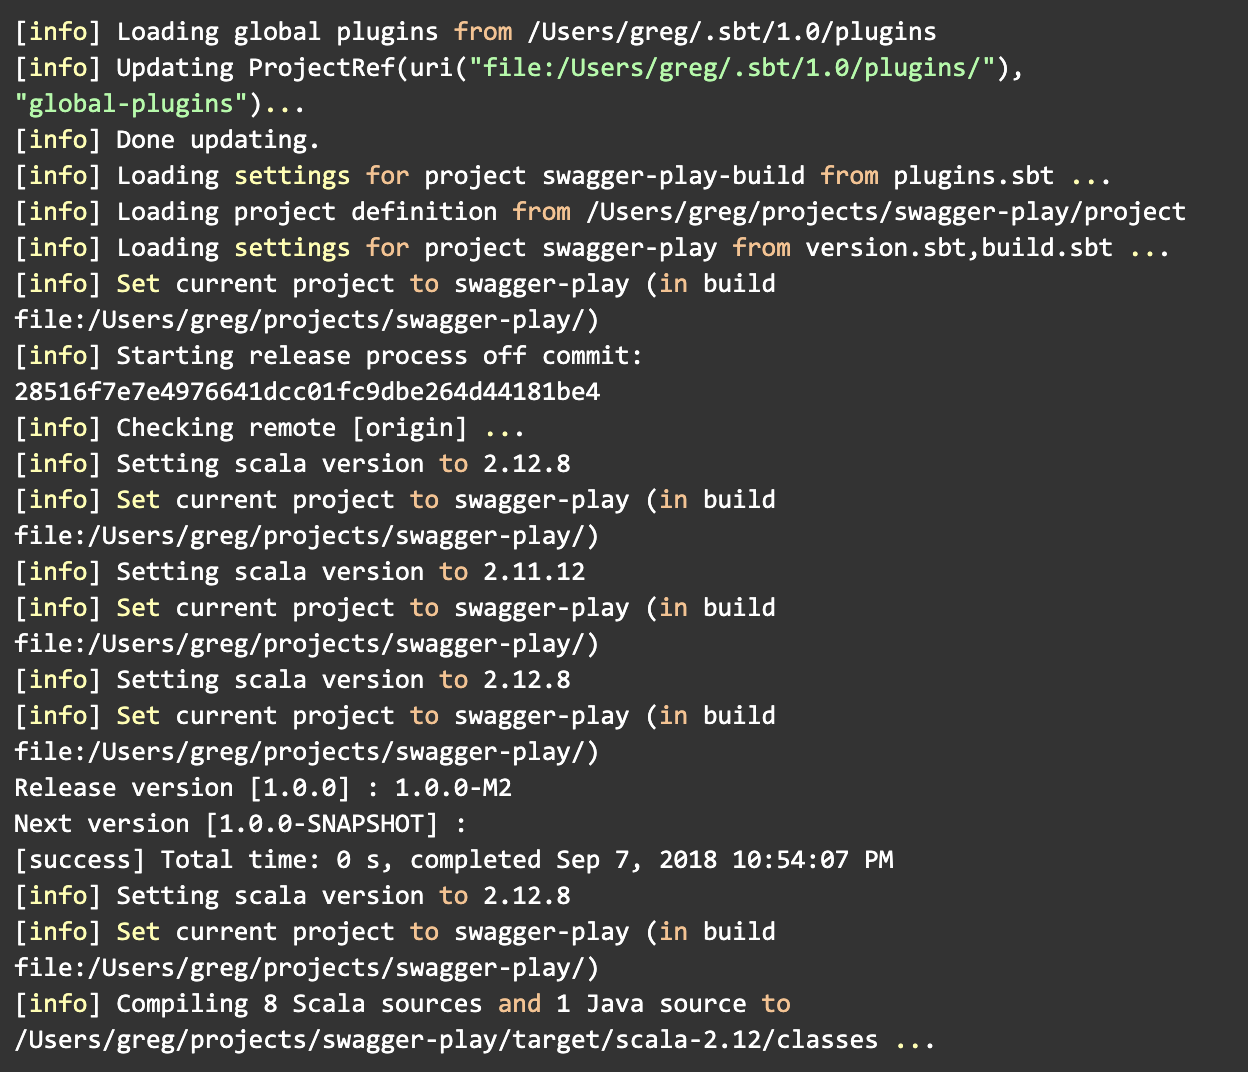
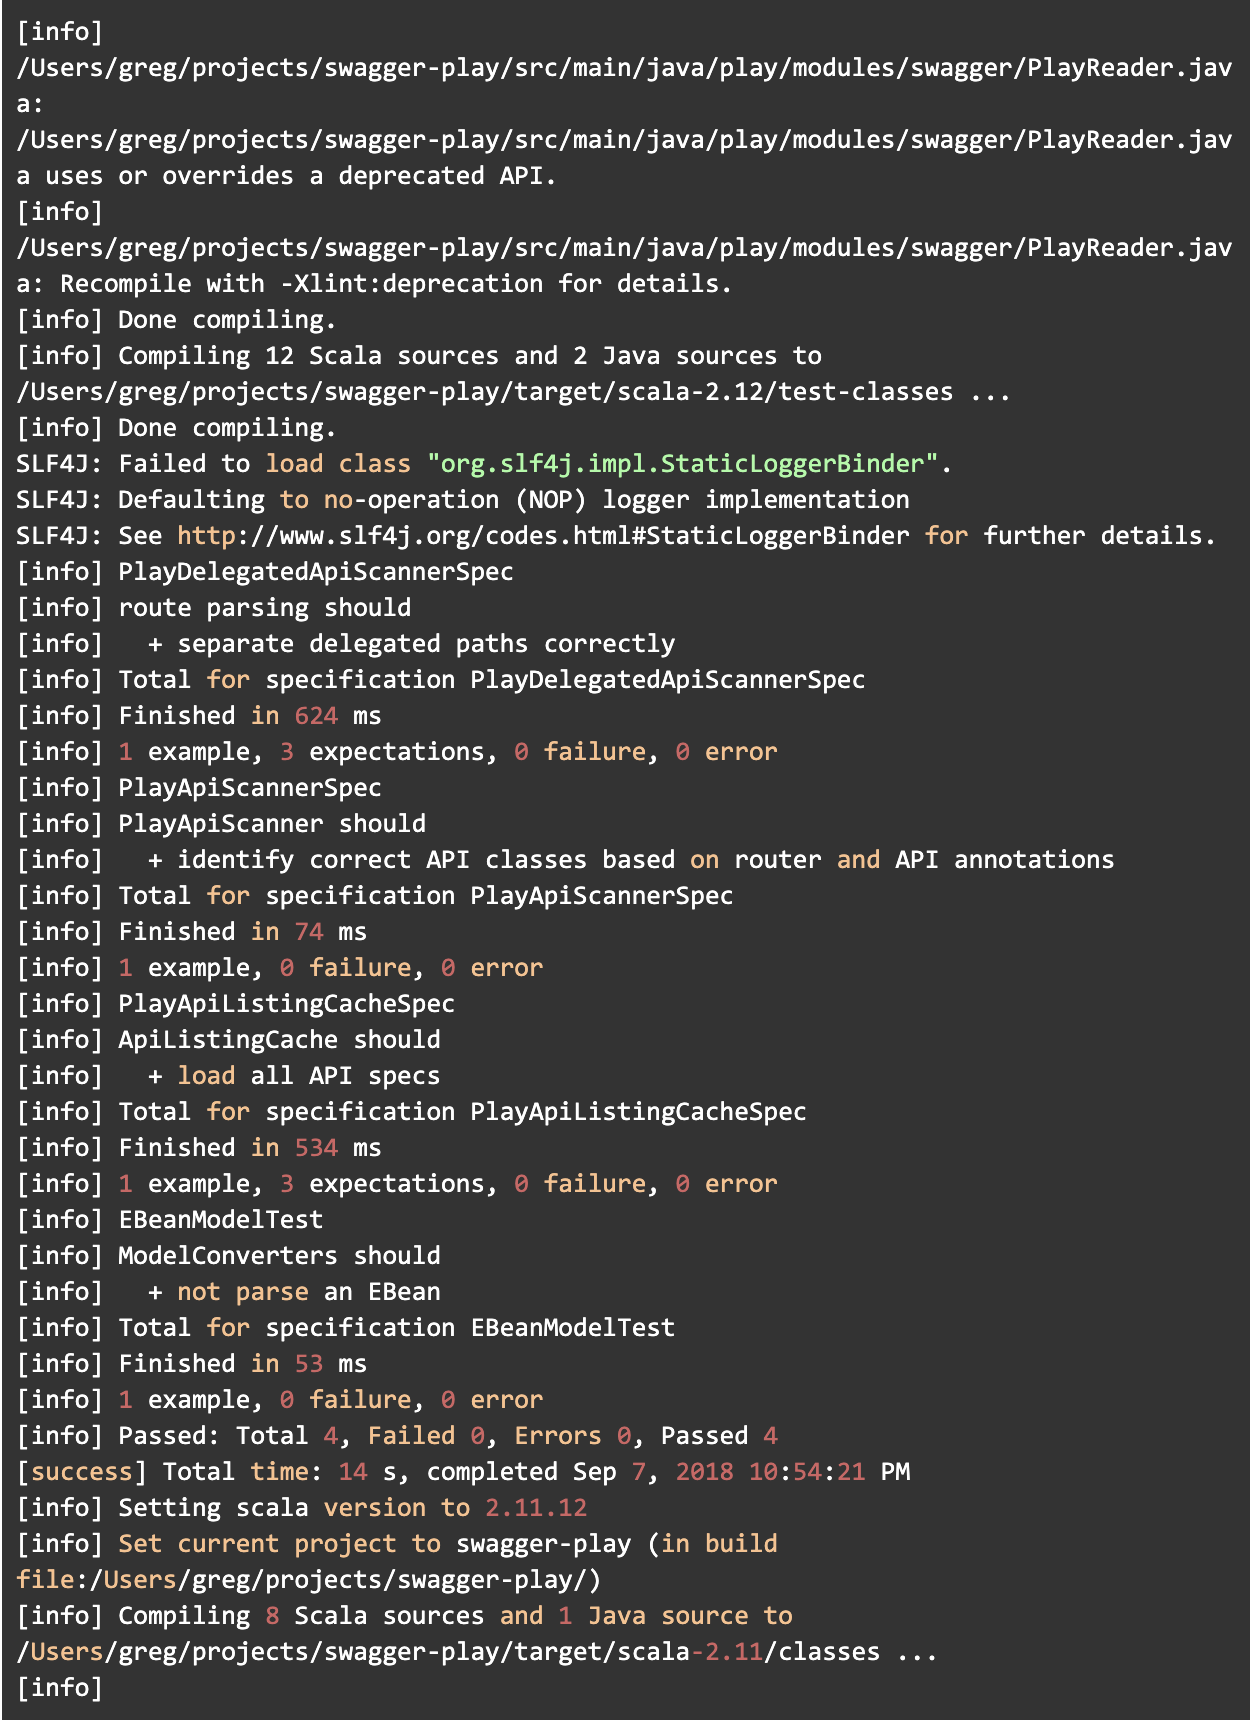
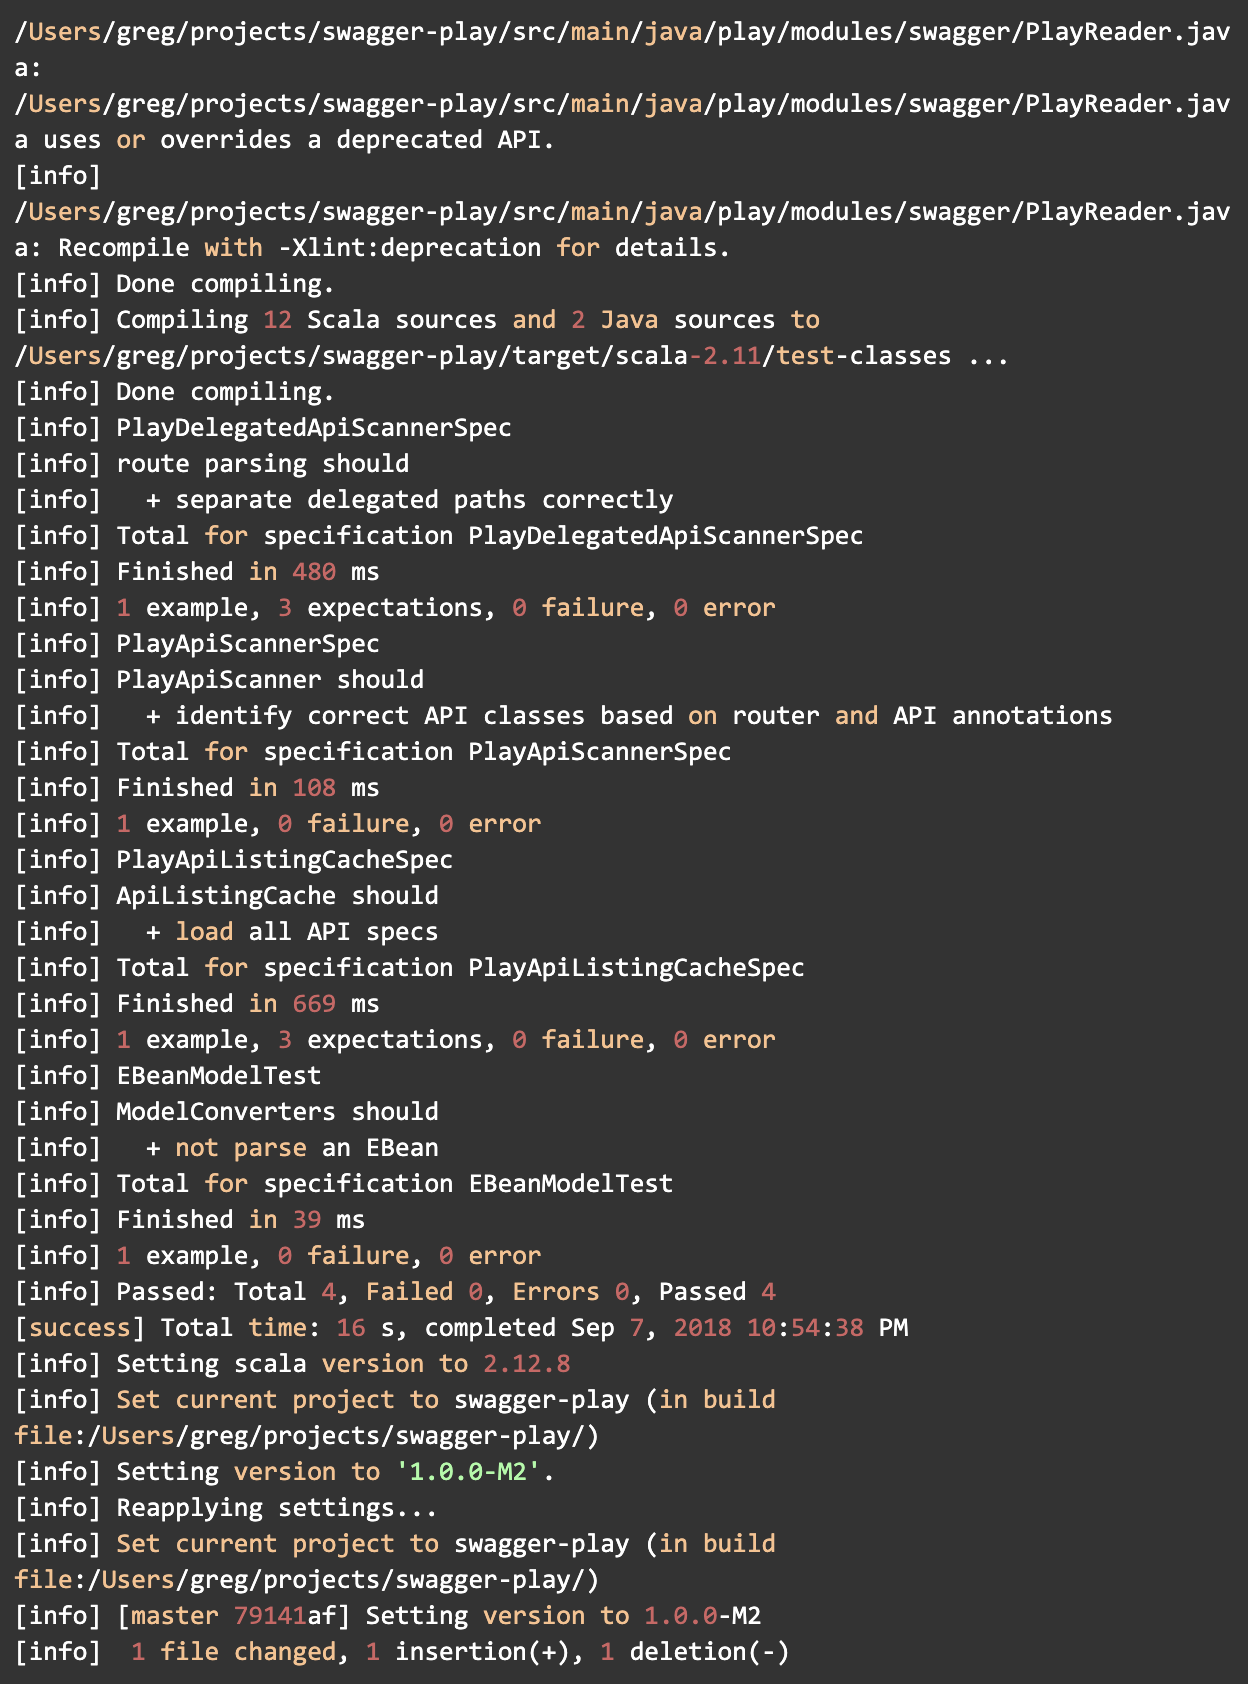
At this point, you can run the sbt release command anytime you want to create a new release. The whole process looks something like this:
If this all worked, congratulate yourself on your new release process!